Flight Laboratory
TL/DR
- Welcome to my new side project: Flight Laboratory
- Flight Laboratory is planned as a Qt-based playground for experimenting with aviation, avionics and GNC concepts.
- The application will combine a C++ back end for things like flight dynamics, controllers, filters and sensor inputs with a QML front end for visualization.
- The UI will be built from reusable components, ranging from avionics instruments and flight-data plots to visualizations for things like EKFs.
- These components will be combined into presets focused on specific topics, such as tuning a controller for aircraft attitude control.
- The project will grow organically, with new components and experiments added as I explore different areas of GNC and avionics.
- As a first step, I’m using an artificial horizon to get the Qt/QML side of things off the ground before connecting it to the C++ back end and eventually more realistic flight data.
Well, recently I was looking to advance my career and search for a new opportunity. One of the roles I was looking at was that of the GNC engineer: the guidance, navigation and control engineer who is responsible for much of what keeps an autonomous vehicle in the air, on the road, or on the correct side of the coast, and much of its behaviour. Luckily, the role I was in at the time was the same: the junior GNC engineer, specifically focussing on delivery drones.
But when I started applying for roles and being interviewed, I noticed significant gaps in my GNC knowledge, as my tasks often weren’t focussed enough (and maybe I wasn’t focussing enough on retaining and structuring everything I learned) to create the solid foundation needed to advance my engineering skills in the vast subject that is GNC. So I started preparing. Studying. Learning about control, refreshing my navigation and estimation knowledge. And during this time, I developed a renewed fascination for the topic, which I had originally learned to love when starting out with Formula Student during my studies.
But there was a conflict. I had the opportunity to take on new, exciting GNC roles. But I also had another opportunity. One I had dreamed of since childhood days. The role of avionics software engineer.
In simple terms, avionics consists of all electronics and computer systems running on an aircraft, helicopter or space vehicle. And becoming an avionics software engineer was, for me, the pinnacle of software engineering. And hey, in my mind, GNC is a sub-field of avionics.
But I wouldn’t be getting GNC tasks off the bat. So instead, to keep the existing GNC knowledge from vanishing and also gaining further knowledge and practical experience in the area, I decided to start a personal project that draws from both levels: GNC and avionics.
And what better way to do that than to start by building the quintessential avionics instrument: the artificial horizon? And, say, feeding it with the data from an incredibly simple flight dynamics model that is tracking a generic setpoint?
As I had also been working on UI creation with Qt before, I decided this was the perfect opportunity to create an all-encompassing project I creatively coined Flight Laboratory.
Here it is: GitHub
That is how the following vague vision of this project came to be (not exactly requirement engineering, but good enough here):
The Vague Vision
Flight Laboratory will be, a playground for all things aviation, avionics, GNC etc. It provides a Qt-Based UI that should provide a combination of reusable visual elements.
Based on these elements (e.g. avionics instruments such as a virtual horizon, or a graph to visualize flight data/control data all the way to e.g. EKF visualizations and beyond), there will be presets the user can choose from to focus on a certain topic (e.g. to learn how to tune a controller to control a plane’s attitude).
Coupled with these visual elements shall be the bread and butter that powers them: Controllers, Kalman filters, trajectory generators, drivers for possible sensor input etc.
It should provide a learning platform that is expandable to each and every topic one might think of.
Importantly, it should grow organically, new elements and presets being added as the idea comes along.
Documentation Here
As I build, I plan to write an article here and there to report the insights I gained and make the progress tangible.
Implementation
The foundation for the app is Qt, a well known framework for building graphical user interfaces. The “back end”, the part that controls the data behind the UI is written in C++ with elements of the Qt framework. The front end, which the user sees and interacts with can be developed either with a part of the framework called Qt Widgets, a very visual way of designing by dragging and dropping elements, or using Qt Quick.
The latter is a library that is used in combination with QML, the Qt Meta-object Language. This is a declarative markup language with which UIs can be designed in a highly flexible and dynamic way. It also allows the use of Javascript to allow the UI to dynamically react to and manipulate various things.
Prominently, Qt is at the base of many automotive infotainment systems, e.g. by Mercedes-Benz or Tesla, as well as Garmin or Airbus for various user interfaces and avionics displays. Seeing that this project will play in a similar league, Qt is therefore the obvious choice.
QML roughly looks like this:
1
2
3
4
5
6
7
8
9
10
11
12
13
14
15
16
17
18
19
20
21
22
23
24
25
26
27
28
29
30
31
32
33
34
35
36
37
38
39
40
41
42
43
44
45
46
47
48
import QtQuick
import QtQuick.Layouts
import QtQuick.Controls.Basic


ApplicationWindow {
    id: window
    width: 640
    height: 480
    minimumWidth: 200
    minimumHeight: 250
    visible: true
    title: qsTr("Hello World")

    GridLayout {
        id: rectangle_grid
        anchors.fill: parent
        columns: 3
        rows: 4

        Rectangle {
            id: rectangle
            radius: 5
            Layout.fillHeight: true
            Layout.fillWidth: true
            Layout.columnSpan: 3
        }

        Repeater {
            model: 9
            Rectangle {
                radius: 5
                Layout.fillHeight: true
                Layout.fillWidth: true
                color: "blue"

                Text {
                    text: modelData
                    anchors.centerIn: parent
                    color: "white"
                    font.pixelSize: 20
                    font.bold: true
                }
            }
        }
    }
}
which leads to the following outcome:
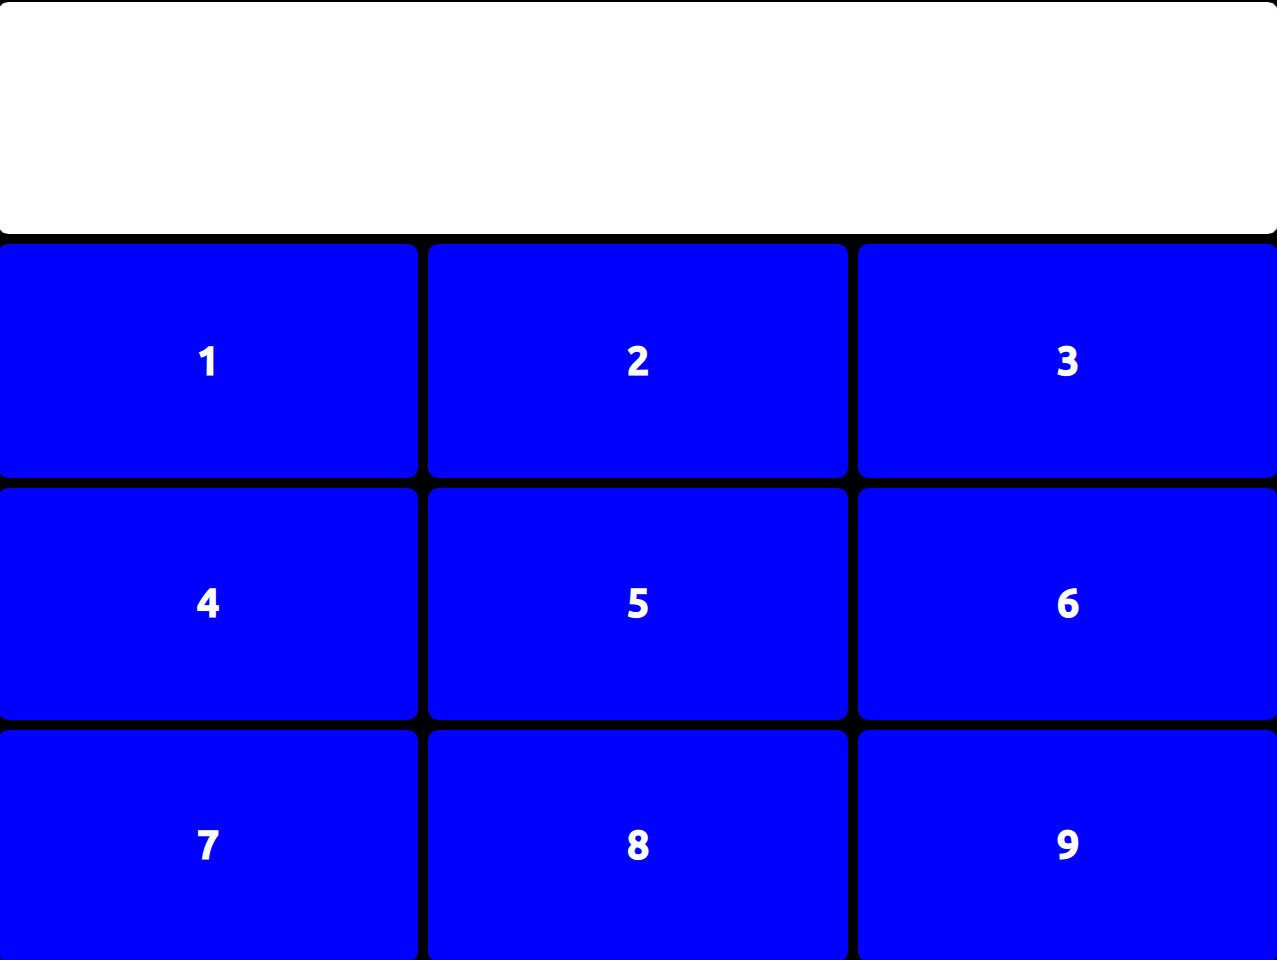
Which is…well a numpad that has no 0 and does nothing, but you get the picture.
I will outline my thought process roughly over here. For more detail, please take a look at the actual implementation and documentation!
The First Steps
Let’s dig in and get right to the exciting stuff: installing Qt.
I just went here and followed the instructions.
The Artificial Horizon
As this project was initially used to refresh my rusty QML skills, I didn’t bother with any actual back-end data controls, but got started with the UI right away. And what cooler or more aviation-looking device is there than the artificial horizon? Correct, none! (I might repeat this statement about other things down the line :D).
The first thing I did after creating the project foundation in Qt Creator (just the boilerplate necessary to build everything, Qt Creator, which is the Qt-Native IDE holds your hand here), I created a custom component.
A component is basically a template that can be created to form part of a larger UI. In this case, as I wanted this project to be able to grow sustainably, this was the right way to go.
In this component, I started by creating the background, the classic brownish ground and blue sky, which I cropped to a circle, added a ring around it to form a bezel and allowed it to translate up and down to indicate pitching, and to rotate around the center point to indicate roll. This included calculating how many on-screen pixels corresponded to which roll angle. I “drew” this using a Qt canvas, which, as the name suggests, allows you to programmatically draw and design more or less anything.
Then I added a so-called pipper, which is the static indication thing in the middle. To let the pilot (or in this case, me) actually read how much pitch and roll the pretend vehicle is experiencing, I added a pitch ladder (I called it that, don’t know the technical term), and ticks along the bezel, along with a triangular pointer shape that points to these ticks at the according roll angles.
Now I made that all sound very easy and straightforward. But to people who are rusty or not used to QML and its mindset, this comes closer to rocket science. BUT: don’t worry, that genuinely comes with practice 😎
Anyway, this is what the first version looks like:
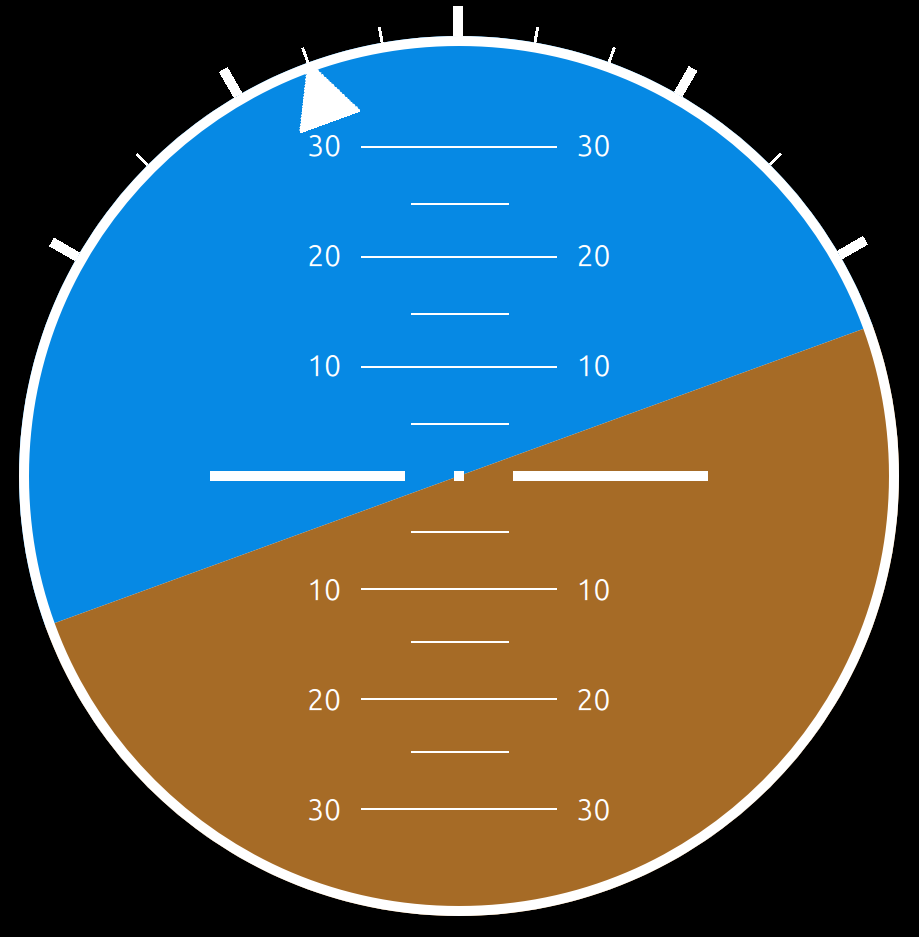
It is very basic indeed, but it does the job for now.
The Data Source
Now that the GUI was there, that obviously needed some inputs to check if it displays the correct attitude. Or just actually moves. This is where the C++ back end comes in.
Here, we basically create a new C++ class that inherits from “QObject”. This allows the C++ backend to use elements from the Qt framework, such as the following:
Properties
Properties are attributes that can be assigned to QML items (such as my artificial horizon component). To be able to manipulate these properties in C++, getters and setters can be defined and exposed to the QML front end via the use of the Q_PROPERTY macro. A useful thing to do with properties is…to change them. Such a property might be the roll angle that the front end can display. If the backend receives a roll input from a gyroscope, the C++ backend can process this input and set the roll property, which can then be read by the front end.
A definition of a property in C++ looks like this:
READ tells QML how to get the roll data for display. Other common exposeable details are WRITE tells it what function to call if it wanted to change the roll angle itself (not intended here). The third is NOTIFY. This one is essential, tells the front end how to know when the roll angle has a new value. The mechanism used for that is the Signal-Slot mechanism.
Signals and Slots
Say you have a C++ function that calculates the new roll angle. This function can then emit a so-called signal. And this signal (often called something like <property>Changed, e.g. rollChanged here). And behind the scenes, Qt creates so-called slots. A slot is a function that is executed when the rollChanged signal is emitted. And this signal is what is defined in the Q_PROPERTY macro with the NOTIFY keyword.
So I did the simplest thing I could think of and simply let the C++ backend generate a roll angle in the shape of a sin-wave, emit the according rollChanged signal and watched everyone on my pretend plane panic and become seasick 🙃.